X-Ray Diffraction (XRD)
The X-ray Diffraction (XRD) residual stress measurement method determines if critical components can withstand the load and stress of operating conditions.
XRD is the method of choice for high-resolution measurement of surface and near-surface residual stress, where most stress-related cracking occurs.
How Does It Work?
XRD can be used to determine residual stresses in any direction within the sample surface. Measurements are made with respect to position over a sample’s surface and incrementally with depth.
The XRD method is based on linear elastic stress-strain theory and involves measuring the angle of maximum diffracted intensity when a polycrystalline sample is irradiated. From the angle of the diffraction peak, the lattice spacing of a specific set of lattice planes can be calculated using Bragg’s law.
For a stressed sample, the lattice spacing varies with angular orientation of the lattice planes. This change in lattice spacing is used to calculate the strain from which the stress can be determined.
X-Ray Diffraction Features:
- XRD can be used on any polycrystalline material, including metals and ceramics, and tests can be performed on a large array of sizes and geometries.
- XRD provides the highest spatial and depth resolution of any measurement method.
- XRD is the preferred method to measure residual stresses from manufacturing processes such as turning, grinding, milling, welding, shot peening, carburizing and induction hardening, or for high spatial resolution adjacent to fractures, welds, and similar features.
- XRD can be used to determine residual stresses in any direction within the plane of a sample surface. Measurements can be made with respect to position over a sample’s surface and incrementally with depth.
- XRD can be used to measure the surface residual stresses non-destructively. In order to measure residual stress incrementally with depth, the material is removed by an electropolish process to ensure residual stresses are not introduced during material removal.


How are Lambda’s X-ray diffraction services superior?
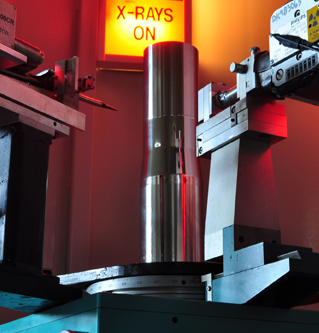
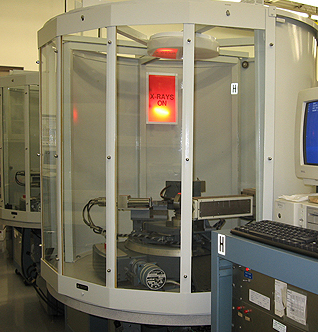
- Lambda uses diffractometers that are custom developed and built in-house specifically for residual stress measurement.
- XRD systems are a Bragg-Brentano geometry with a large goniometer radius allowing for higher accuracy measurement compared to standard portable systems.
- Our diffractometers are capable of accepting a large range of sample sizes.
- With more than half a million completed measurements, over 100 technical papers published, and authorship of the American Society for Metals “X-ray Diffraction Residual Stress Techniques,” Lambda is the world’s premier provider of XRD residual stress analysis.
Additional XRD Features:
Diffractometers
X-Ray Detectors
X-Ray Elastic Constant Determination
Lambda measures the x-ray elastic constants required to calculate strain by residual stress measurement. It is necessary to determine the x-ray elastic constant for the specific set of crystallographic planes being measured. Lambda has a database containing several hundred x-ray elastic constants.
Electropolishing Layer Removal
Subsurface residual stress measurements are recommended in order to fully understand the residual stress distribution. Electropolishing is the only viable means of removing material without inducing residual stresses. Lambda has several specially formulated electropolishing solutions to provide a finish and flatness necessary for accurate residual stress measurement. Electropolishing depths can be measured to a precision of 0.0001 in. (0.003 mm).
Material Property Prediction from Line Broadening
Lambda has developed methods of predicting material property information using x-ray diffraction testing with line broadening. Line broadening data collected during a standard residual stress measurement can provide material information such as cold working and hardness.
Automated Mapping
Lambda has developed automated sample translation tables to map the residual stresses via x-ray diffraction analysis. The translation system allows our technicians to easily measure a precise set of points automatically. Results can be plotted to provide a high-resolution residual stress contour describing areas of high gradients and peak residual stresses.
Automated Depth Profiling
Lambda has designed and patented a device that performs automated residual stress depth profiling. The device accepts two samples. Residual stress measurements by x-ray diffraction are made on one sample while the other sample is electropolished — the device alternately electropolishes and measures both samples to rapidly obtain residual stress vs. depth on both samples.
Questions about XRD testing or other residual stress measurement needs?
Additional XRD Resources:
Lambda Research Diffraction Notes, (No. 19) – “Residual Stress Contour Mapping“
(No. 223) “The Effect of Cold Work on the Thermal Stability of Residual Compression in Surface Enhanced IN718“
(No. 225) “The Effect of Prior Cold Work on Tensile Residual Stress Development in Nuclear Weldments“
(No. 229) “Quality Assurance of Shot Peening by Automated Surface and Subsurface Residual Stress Measurement”

